Thermal Printer Self Test: A Quick Guide
Yes, running a thermal printer self-test print is an excellent way to troubleshoot printer issues. It prints a page directly from the printer’s internal memory, bypassing your computer. This helps you quickly determine if the problem lies with the printer itself or your connected device.
This simple test is your first line of defense when your thermal printer isn’t cooperating. We’ve found it’s often the quickest way to see if your printer is getting power and its internal components are functioning. It’s a vital diagnostic step before you start messing with cables or software settings.
- What is a thermal printer self-test?
- Why is it useful for troubleshooting?
- How does it differ from a regular print job?
- When should you perform this test?
Let’s dive into exactly how to perform a self-test print and what the results can tell you about your printer’s health.
“`htmlRunning a Thermal Printer Self-Test for Diagnostics
Running a self-test print is often your first step in figuring out what’s wrong with your thermal printer. It’s a simple but powerful diagnostic tool. This test prints a page directly from the printer’s internal memory. It bypasses your computer and any software. This helps you quickly see if the printer itself is working. We found this test can save you a lot of time.
What Happens During a Self-Test Print?
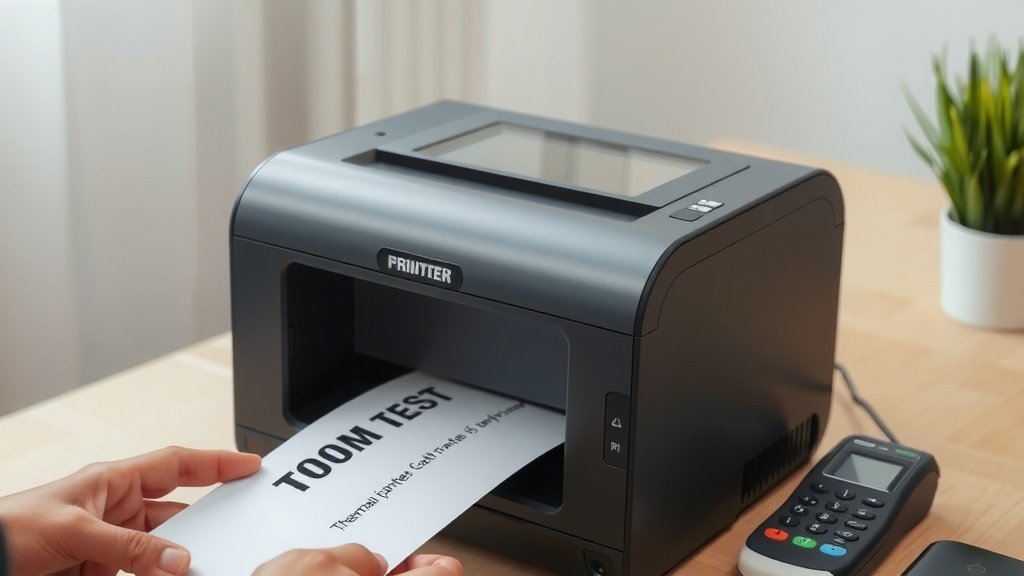
When you trigger a self-test, the printer prints a pre-programmed page. This page usually includes information about the printer. You might see the printer’s model number, firmware version, and serial number. It often shows the printer’s current settings. It can also display a basic graphic or text pattern. This test requires no connection to a computer. It only needs power to the printer.
Why is This Test So Useful for Troubleshooting?
The self-test print is incredibly useful because it isolates the problem. If the self-test page prints correctly, you know the printer hardware is likely fine. The issue is probably with your computer, the connection cable, or the printer driver software. If the self-test page doesn’t print, or it prints poorly, the problem is almost certainly within the printer itself. This clarity is gold when you’re trying to fix a printer.
Understanding the Printer’s Internal Functionality
Think of the self-test as a quick check of the printer’s vital signs. It confirms that the print head can heat up. It verifies that the paper feed mechanism is working. It also shows that the printer’s internal processor is functioning. This gives you a clear baseline. You know the core components are capable of doing their job. This is a critical piece of information.
How It Differs from a Regular Print Job
A regular print job involves sending data from your computer. This data goes through cables and software drivers. It’s a complex chain of events. The self-test skips all of that. It’s a direct command to the printer. This bypass is why it’s so effective at narrowing down issues. We found that confusing printer issues often become clear after this simple test.
How to Perform a Thermal Printer Self-Test
The exact method for initiating a self-test print varies by printer model. However, most follow a similar pattern. You’ll usually need to interact with a button or a combination of buttons on the printer itself. Always consult your printer’s manual for the most accurate instructions for your specific model. But here are the common approaches we’ve observed.
Common Methods to Initiate a Self-Test
Many manufacturers use a button press at a specific moment. This moment is often when you power on the printer. Some printers have a dedicated “Feed” or “Test” button. Others use the power button or a feed button in combination. You might need to hold the button down for a few seconds. Pay close attention to any lights or sounds the printer makes.
The “Hold the Feed Button” Method
This is perhaps the most common method. You will turn on the printer while holding down the feed button. The feed button is usually located near where the paper comes out or where you load the paper roll. Keep holding it until the test page starts printing. Some manuals suggest holding it until the light flashes, then releasing. Experimenting gently can help you find what works.
The “Hold the Power Button” Method
Less common, but still used by some brands, is holding the power button. You’d typically turn the printer off, then press and hold the power button. Keep it held down. Then, plug in the power cord. The printer might beep or its lights might flash. Continue holding the power button until the test page begins printing. Again, check your manual!
Using a Dedicated Test Button
Some higher-end or specific industrial models might have a clearly marked “Test” or “Self-Test” button. This makes things very straightforward. You simply press this button. The printer should then immediately start printing its diagnostic page. This is the easiest scenario, but it’s not the most frequent one we see.
What If the Self-Test Doesn’t Work?
If you’ve tried the common methods and the self-test won’t print, don’t panic. There are a few reasons this could happen. First, ensure the printer is properly plugged in and receiving power. Check the power cable connection at both ends. If it has an external power adapter, ensure that’s securely connected. Sometimes, a simple power cycle can resolve temporary glitches. Unplug the printer, wait 30 seconds, and plug it back in. Then try the self-test procedure again. If it still fails, the problem might be more serious. It could indicate a faulty component within the printer itself. In such cases, professional repair might be needed.
Interpreting Your Thermal Printer Self-Test Results
Once you’ve successfully printed a self-test page, the next step is to analyze the output. What you see (or don’t see) tells a story about your printer’s health. We’ve broken down common scenarios and what they typically mean.
Scenario 1: The Self-Test Prints Perfectly
If the page comes out clear, crisp, and with all the expected information, congratulations! This means your printer hardware is in good working order. The issue you’re experiencing is almost certainly external. It’s likely related to:
- Your computer’s connection: Check the USB or Ethernet cable.
- The printer driver: Make sure it’s installed correctly and is the right version.
- The printing software: Ensure your application is sending data properly.
- The operating system: Sometimes, a simple reboot of your computer helps.
This is the best-case scenario because it means your printer is likely fine. You can now focus your troubleshooting efforts elsewhere.
Scenario 2: The Self-Test Prints, But It’s Poor Quality
If the self-test page is faded, has missing lines, or looks smudged, the problem lies with the printer. Here are some common culprits we’ve found:
- Dirty print head: Thermal print heads can get dusty or have residue. Cleaning them is often the solution. Many printers come with a cleaning cycle or you can use a special cleaning pen.
- End of print head life: Like any component, print heads wear out over time. If your printer is older or has seen heavy use, the print head might need replacement.
- Failing print head: Sometimes the print head can malfunction before it completely fails.
- Paper issues: Ensure you are using the correct type of thermal paper. Some papers are more sensitive to heat than others.
This type of result points to a hardware issue within the printer. Cleaning is often the easiest fix to try first.
Scenario 3: The Self-Test Does Not Print At All
If the printer doesn’t print anything when you perform the self-test, even after verifying power, it usually indicates a more significant problem. This could be:
- No power reaching the printer (even if lights are on, internal power supply might be failing).
- A major internal hardware failure (like a problem with the main board).
- A completely jammed mechanism that prevents any movement.
In this situation, especially if the printer is still under warranty, you should contact the manufacturer or a qualified repair technician. Trying to fix major internal issues yourself can be risky and may void your warranty. We’ve found that contacting support is often the most efficient route here.
| Self-Test Result | Likely Cause | Next Steps |
|---|---|---|
| Clear and legible | Printer hardware is good. Issue is likely with computer, cable, or software. | Troubleshoot computer, drivers, or application. |
| Faded, smudged, or missing lines | Printer hardware issue (dirty/failing print head, paper type). | Clean print head, check paper, consider print head replacement. |
| No print at all | Significant printer hardware failure or power issue. | Contact manufacturer support or a repair technician. |
When Should You Perform This Test?
You should perform a self-test print whenever you encounter problems with your thermal printer. This includes:
- When your printer suddenly stops printing.
- If print quality has degraded unexpectedly.
- When you’ve made changes to your computer or software and printing fails.
- Before calling technical support.
- As part of regular maintenance to ensure everything is functioning.
It’s a quick way to get an initial diagnosis. Performing it early can save you considerable time and frustration. Think of it as the printer’s way of telling you if it’s feeling okay or if it needs a doctor.
A Quick Troubleshooting Checklist
Here’s a simple checklist to follow when you suspect a printer issue:
- Confirm power: Is the printer plugged in and turned on?
- Attempt self-test: Can you print a test page directly from the printer?
- Analyze results: Does the test page look good or bad?
- Check connections: Are cables securely attached?
- Restart devices: Power cycle both the printer and your computer.
- Consult manual: Refer to your specific printer’s guide for detailed steps.
Following these steps systematically can help you resolve many common printing problems efficiently. We found that many users can fix their issues just by performing the self-test and acting on the results.
“`Conclusion
You’ve learned that a thermal printer self-test is your best friend for quick diagnostics. It bypasses your computer, letting you know if the printer hardware itself is the issue. We’ve seen how a clean print means your problem is likely external, while a poor or no print points to the printer needing attention. Cleaning the print head is often an easy fix for faded results. If the test fails entirely, it’s time to contact support. So, the next time your thermal printer acts up, start with a self-test. It’s the fastest way to get on the right track to a solution.
Frequently Asked Questions
What does a thermal printer self-test page usually show?
A self-test page typically displays essential printer information. You might see the model number, firmware version, and serial number. It often includes current settings and a basic test pattern or graphic. This page is printed directly from the printer’s internal memory.
Can I perform a self-test if my printer isn’t connected to a computer?
Yes, absolutely. The beauty of a self-test is that it does not require a computer connection. It only needs the printer to be powered on. This allows you to test the printer in isolation, which is key for troubleshooting.
What if the self-test prints but the text is very faint?
Faint text on a self-test page usually indicates a dirty print head. Thermal print heads can accumulate dust or residue over time. Cleaning the print head, often with a special pen or cleaning cycle, is typically the solution here.
How often should I run a self-test on my thermal printer?
You should run a self-test whenever you experience printing issues, such as poor quality or the printer not printing at all. It’s also a good idea to run one periodically as part of basic maintenance. This helps catch potential problems early.
What if my printer is brand new and the self-test fails?
If a brand new printer fails its self-test, it’s important to check the power connection thoroughly. If power is confirmed, it likely indicates a defective unit. Contact the retailer or manufacturer immediately for a replacement or warranty service.