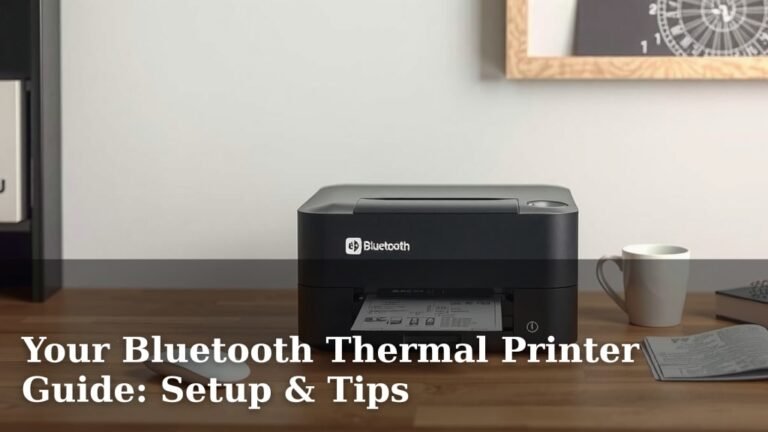
Thermal Printer Do’s and Don’ts for Optimal Performance
Using a thermal printer correctly is key to hassle-free printing. You can get the best results by following a few simple dos and don’ts. This ensures your prints are clear and your printer lasts longer.
Many users struggle with issues like faded prints or paper jams. Understanding common mistakes can save you time and money. We’ve gathered the top tips to help your thermal printer perform at its best for every print job.
- Do use the right kind of thermal paper.
- Don’t expose prints to heat or direct sunlight.
- Do keep your printer clean regularly.
- Don’t force paper into the printer.
- Do check your printer settings.
Let’s walk through the essential thermal printer dos and don’ts so you can print with confidence.
Mastering Your Thermal Printer: What to Do and What to Avoid
Getting the most out of your thermal printer is easier than you might think. It all comes down to a few smart habits. We’ve put together a guide to help you avoid common pitfalls and keep your printer running smoothly. Let’s get your prints looking their best.
The Paper Predicament: Choosing the Right Stuff
Do Use Genuine Thermal Paper
This might seem obvious, but it’s the most important rule. Your thermal printer needs special thermal paper to work. This paper has a heat-sensitive coating. When the print head heats up, it causes a chemical reaction. This reaction creates the dark marks that form your text and images. Using regular paper won’t work. It won’t create any print at all.
Don’t Substitute with Other Paper Types
Sticking to the correct paper type prevents a lot of headaches. If you try to use plain paper, inkjet paper, or even cardstock, you’re setting yourself up for failure. The print head won’t be able to make a mark. It might even damage the sensitive heating elements. Always double-check that you have the right thermal receipt paper or label stock.
Consider the Paper’s Longevity
Not all thermal papers are created equal. Some are designed for short-term use, like receipts you’ll only look at for a few days. Others are built for longer-term storage. If your prints need to last for months or years, you’ll want to invest in longer-lasting thermal paper. This type has a coating that is more resistant to fading from light and heat. Research your options based on how long you need the prints to remain legible.
Keeping It Clean for Crisp Prints
Do Perform Regular Cleaning
Think of cleaning your thermal printer like brushing your teeth. It’s a simple routine that prevents bigger problems. The print head can accumulate dust, debris, and even paper residue. This buildup can cause faded lines, smudges, or gaps in your printouts. A clean print head is essential for sharp, clear text and graphics. We recommend cleaning it at least once a month, or more often if you print heavily.
How to Clean the Print Head
You’ll typically need a specialized cleaning pen or a lint-free cloth dampened with isopropyl alcohol. Power off your printer before you start. Gently wipe the print head from one end to the other. Be sure to let the alcohol dry completely before powering the printer back on. Many printer manufacturers provide specific cleaning instructions, so check your manual if you have it handy.
Don’t Use Abrasive Materials
When cleaning, avoid anything rough. Paper towels can leave lint behind. Harsh chemicals can damage the delicate print head coating. Stick to soft, lint-free cloths and approved cleaning solutions. Your goal is to remove debris, not to scratch or erode the print head. Gentleness is key to maintaining its performance and lifespan.
Don’t Neglect Other Areas
While the print head is most critical, don’t forget the paper path. Dust and small paper scraps can get lodged in rollers. Use a soft brush or compressed air (held at a distance) to clear out the paper path. A clean paper path ensures smooth feeding and reduces the chance of jams.
Printer Settings: The Unsung Hero
Do Check Your Printer Settings
Did you know your computer or device has settings that directly affect your thermal prints? These settings control things like print darkness and speed. Sometimes, these can get accidentally changed. A quick check can often solve print quality issues. For example, if your prints are too light, you might need to increase the print darkness setting.
Adjusting Print Darkness
Most thermal printers allow you to adjust the darkness or “density” of the print. You can usually find this setting within your printer’s driver software on your computer. Look for options like “Darkness,” “Density,” or “Print Quality.” Experiment with these settings, printing a test page each time. Find the sweet spot that gives you clear, dark text without being so dark that it smudges.
Understanding Print Speed
Some printers also let you adjust the print speed. Printing faster can sometimes lead to lighter or less defined prints. If you’re having quality issues, try slowing down the print speed. This gives the print head more time to heat up and transfer the image to the paper properly. Many experts suggest starting with a moderate speed and adjusting as needed (Printer Manufacturer Guidelines).
Don’t Overlook Driver Updates
Printer manufacturers regularly release updated drivers. These updates can improve performance, fix bugs, and add new features. Ensure you are using the latest driver for your specific printer model. You can usually find these on the manufacturer’s official website. Keeping your drivers up-to-date is a simple step that can prevent many unexpected problems.

Handling and Storage: Protecting Your Prints
Don’t Expose Prints to Heat or Sunlight
Thermal prints are sensitive to their environment. Direct sunlight, high temperatures, and even friction can cause them to fade prematurely. This is because the heat-sensitive coating can react and darken or fade unevenly. For important documents, consider making a photocopy or scanning them into a digital format. Store them in a cool, dark place away from heat sources.
Don’t Rub or Scratch the Prints
The surface of a thermal print is delicate. Rubbing it vigorously with your thumb or a rough material can cause it to smudge or fade. Likewise, scratching the surface can damage the coating and make the print unreadable. Treat your thermal prints with care, especially if they are meant to be kept for a long time.
Do Store Properly
If you need to keep thermal prints for an extended period, proper storage is key. Avoid storing them in plastic bags for too long, as some plastics can react with the coating. Archival-quality paper sleeves or folders are a better choice. Keep them in a climate-controlled environment, away from direct light and extreme temperatures. Some research indicates that keeping prints away from certain adhesive materials can also help prevent fading (Paper Conservation Studies).
Loading and Operation: Smooth Sailing
Do Load Paper Correctly
Most thermal printers have a clear indicator for how to load the paper roll or stack. Ensure the paper is feeding from the correct side and that it’s aligned properly. If the paper is crooked, it can lead to jams or crooked prints. Take a moment to visually confirm it’s seated correctly before closing the lid or cover.
Don’t Force the Paper
If the paper isn’t feeding smoothly, don’t force it. Forcing jammed paper can tear it. It can also potentially damage the printer’s internal mechanisms, like the feed rollers. Instead, gently retract the paper. Check for any obstructions or misalignments and try again. A paper jam indicator light often signals a problem.
Do Listen to Your Printer
Your printer will often give you cues about its status. Unusual grinding noises, beeping sounds, or error lights are all messages. Pay attention to these signals. They can alert you to a paper jam, a need for cleaning, or a more serious issue. Ignoring these warning signs can lead to more significant damage.
A Quick Checklist for Thermal Printer Success
Here’s a handy checklist to keep your thermal printer in top shape:
- Use only the correct thermal paper type.
- Clean the print head with a proper cleaning tool regularly.
- Check printer driver settings for darkness and speed.
- Store prints in a cool, dark, and dry place.
- Handle prints gently; avoid rubbing or scratching.
- Power off the printer before cleaning or maintenance.
Conclusion
You’ve now got the essential know-how to keep your thermal printer running smoothly. Remember, it’s all about using the right materials, maintaining cleanliness, and paying attention to settings. Simple habits like using genuine thermal paper and regular print head cleaning make a big difference. Treating your prints with care extends their life too. By following these dos and don’ts, you’ll ensure clear, reliable prints every time. Start by checking your printer’s cleaning schedule and gathering the right supplies today!
Frequently Asked Questions
How often should I clean my thermal printer’s print head?
You should clean your thermal printer’s print head at least once a month. If you use your printer very heavily, cleaning it more often is a good idea. This helps prevent faded prints and ensures optimal performance.
Can I use regular paper in my thermal printer?
No, you absolutely cannot use regular paper in a thermal printer. Thermal printers require special heat-sensitive paper. Using regular paper will not produce any print and could potentially damage the printer’s delicate print head.
My thermal prints are fading quickly. What can I do?
If your prints are fading, they might be exposed to too much heat or sunlight. Try storing them in a cool, dark place away from direct light sources. Using longer-lasting thermal paper can also help protect your prints from premature fading.
What’s the best way to deal with a paper jam?
If you encounter a paper jam, don’t force the paper. Gently try to retract it from the printer. Check for any obstructions or if the paper is loaded incorrectly. If it persists, consult your printer’s manual for specific jam-clearing instructions.
Where can I find the latest driver updates for my thermal printer?
You can typically find the latest driver updates for your thermal printer on the official website of the printer’s manufacturer. Searching for your specific printer model on their support page will lead you to the most current software.