Master Your Thermal Printer Settings: A Guide
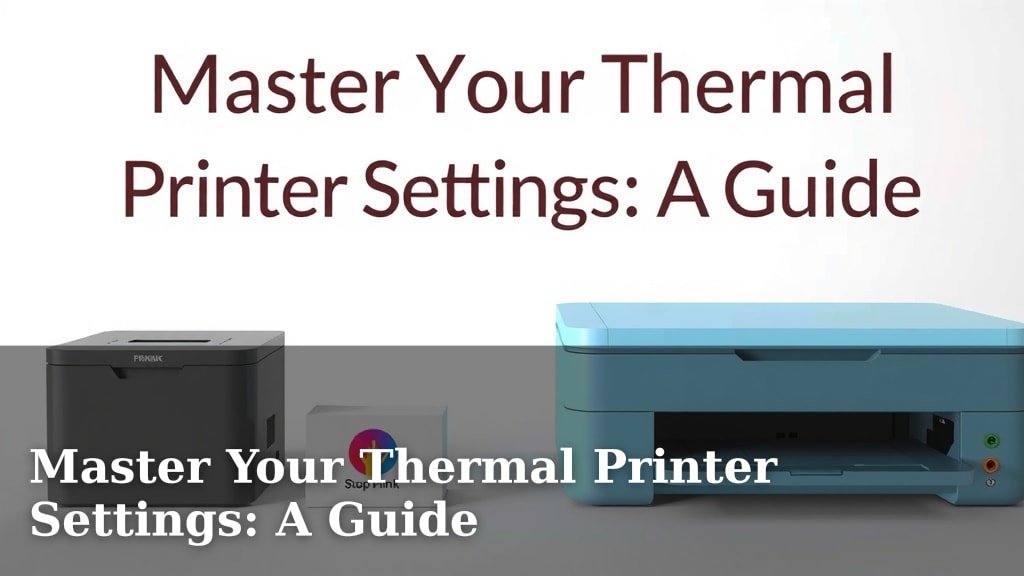
Getting your thermal printer settings just right is key to clear, crisp prints. You can achieve this by adjusting the darkness and speed settings. These two controls have the biggest impact on print quality. Finding the sweet spot means your labels will be easy to read every time.
Understanding these settings helps avoid common thermal printing problems. Issues like faded text or smudged barcodes often stem from incorrect adjustments. We found that many users overlook the importance of balancing these two settings. Getting them dialed in ensures your printer performs at its best for all your needs.
- Adjust darkness for print intensity.
- Control speed for clarity and printer wear.
- Test prints are essential.
- Don’t forget label type matters.
Let’s walk through exactly how to tweak these thermal printer settings to get perfect prints, every single time.
“`htmlFine-Tuning Your Thermal Printer: The Right Settings for Crisp Prints
Getting your thermal printer to produce consistently clear labels can feel like a puzzle. But don’t worry, you’re not alone! Many of us have stared at a faint barcode or a smudged date and wondered, “What went wrong?” The good news is, it’s usually just a matter of adjusting a couple of key settings.
We’ve found that focusing on print darkness and print speed is your best bet for sharp, readable output. These two controls are like the volume and equalizer on a stereo. Get them balanced, and your labels will sound (or look!) just right. Let’s dive into how to nail these settings for your specific printer and labels.
Understanding Print Darkness (or Density)
Think of print darkness as the “oomph” behind your print head. It controls how much heat is applied to the thermal label. More heat generally means a darker, more intense mark on the label. Too little heat, and you get faint, hard-to-read text. Too much, and you risk melting the label coating or even damaging your print head.
The ideal darkness setting depends on a few things:
- The type of thermal label you’re using.
- The print speed you’ve selected.
- The health of your print head.
You’ll often see this setting referred to as “Darkness,” “Density,” or sometimes “Heat.” The scale can vary, often ranging from 1 to 10, 1 to 32, or even higher. Lower numbers typically mean less heat, while higher numbers mean more heat.
Finding the Sweet Spot for Darkness
How do you find that “just right” level? It’s all about testing. Start with a medium setting on your printer’s dial or software. Then, print a sample label with text, a barcode, and maybe a small graphic.
Examine your test print closely. Is the text sharp and black? Can you easily scan the barcode with your reader? If it looks a little faded or gray, try increasing the darkness by one or two increments. Print another test label.
Keep increasing the darkness gradually until the print is nice and bold. Now, here’s a crucial step: check the back of the label. If you can see the printed image showing through strongly, you might be applying too much heat. This can indicate the darkness is too high. You want a solid print without “bleeding” through or appearing to melt the label. Many experts recommend finding the lowest darkness setting that still produces a perfectly readable label (National Association of Printing Manufacturers).
When Darkness Settings Go Wrong
Faded prints? That’s usually a sign the darkness setting is too low. You need more heat to activate the thermal coating on the label. Smudged or fuzzy prints? This could be too much darkness, causing the ink to spread. It can also be a sign of the print speed being too high, which we’ll cover next.
Mastering Print Speed
Print speed dictates how quickly the label moves under the print head. It’s measured in inches or millimeters per second (ips or mm/s). A faster speed means you get labels printed quicker, increasing throughput.
However, speed and quality are often at odds. A slower speed gives the print head more time to transfer heat accurately to the label. This results in clearer, more defined prints, especially for fine details like small text or dense barcodes. A faster speed means less dwell time for the heat.
Balancing Speed and Quality
Most thermal printers can print anywhere from 2 to 12 inches per second, or even faster. For general-purpose labels with standard text and barcodes, a speed of 4 to 6 ips is often a great starting point.
If you’re printing small, detailed graphics or very dense barcodes, you might need to slow down the print speed. This allows the print head’s elements more time to heat up and create a solid mark on the label. We found that slowing down to 3 ips can dramatically improve readability for complex designs.
On the flip side, if you need to print a high volume of simple, large-text labels quickly, you might be able to increase the speed. Just remember to always test your print quality after making speed adjustments. It’s a balancing act!
How Speed Affects Your Printer’s Life
Running your printer at its absolute fastest setting all the time can increase wear and tear on the print head and other components. Thermal print heads are precision instruments, and excessive speed, especially when combined with too much darkness, can shorten their lifespan. Think of it like driving a car – cruising at a moderate speed is easier on the engine than redlining it constantly.
Many manufacturers suggest using the slowest speed that still meets your production needs for optimal printer longevity (Zebra Technologies support documentation).
The Importance of Label Type
You can’t talk about thermal printer settings without mentioning the label itself! Not all thermal labels are created equal. The type of label material and its coating play a huge role in how it accepts heat.
There are two main types of thermal printing:
- Direct Thermal: These labels have a heat-sensitive coating. When heat is applied by the print head, the coating turns black. No ink or ribbon is needed. These are great for shipping labels, receipts, and temporary tags.
- Thermal Transfer: These use a ribbon to transfer ink onto the label material. The print head heats the ribbon, melting the ink onto the label. This is best for durable labels that need to withstand moisture, UV light, or abrasion, like asset tags or durable product labels.
The settings for darkness and speed will vary significantly between direct thermal and thermal transfer labels, and even between different brands or types within those categories.
Matching Settings to Your Labels
Direct thermal labels generally require more heat (higher darkness settings) because you’re directly activating a chemical reaction. They are also more sensitive to speed – too fast, and you might not get enough heat transfer.
Thermal transfer labels often work well with slightly lower darkness settings because you’re transferring ink from a ribbon. However, the ribbon type and the label material itself will influence your ideal settings. Always check the specifications provided by your label and ribbon manufacturer.
Your Printer’s Calibration is Key
Did you know your printer needs to “learn” your label size? Most thermal printers have a calibration function. This process helps the printer detect the gaps between your labels or the black mark on the back of fan-folded media.
Why is this so important? An uncalibrated printer might:
- Feed labels incorrectly, leading to misalignment.
- Print labels in the wrong spot.
- Cause blank spaces where labels should be.
- Skip labels altogether.
Most printers have an automatic calibration feature that you can trigger from the control panel or through the printer driver software. It’s usually as simple as holding down a button while powering on the printer, or running a calibration routine in your software. Consult your printer’s manual for the exact steps!
Putting It All Together: A Quick Checklist
Ready to dial in those settings? Here’s a quick rundown to keep you on track:
- Start with your label type: Direct thermal or thermal transfer?
- Set a moderate speed: Begin with 4-6 ips and adjust as needed.
- Adjust darkness carefully: Aim for bold but not fuzzy prints.
- Check for bleed-through: Don’t use more heat than necessary.
- Scan your barcode: Does it read easily?
- Calibrate your printer: Ensure it knows your label size.
Troubleshooting Common Print Quality Issues
Even with the right settings, you might encounter hiccups. If your prints aren’t perfect, here are some common issues and what to check:
Issue: Faded or Incomplete Print
- Possible Cause: Darkness too low.
- Fix: Increase darkness setting.
- Possible Cause: Label is old or damaged.
- Fix: Try a new roll of labels.
- Possible Cause: Print head is dirty or damaged.
- Fix: Clean the print head (see below). If damaged, it may need replacement.
Issue: Smudged or Blobby Print
- Possible Cause: Darkness too high.
- Fix: Decrease darkness setting.
- Possible Cause: Print speed too high.
- Fix: Decrease print speed.
- Possible Cause: Label coating is melting.
- Fix: Reduce darkness and/or speed.
Issue: Misaligned Labels
- Possible Cause: Printer not calibrated.
- Fix: Run the printer’s calibration routine.
- Possible Cause: Wrong label size set in software/driver.
- Fix: Ensure driver settings match label dimensions.
Keeping Your Print Head Clean
A dirty print head is one of the most common culprits behind poor print quality. Dust, adhesive residue, or debris can build up over time and obstruct the heating elements.
We recommend cleaning the print head regularly, especially when changing label rolls. You can use specialized thermal printer cleaning pens or swabs dipped in isopropyl alcohol (90% or higher). Gently wipe the print head from one end to the other. Make sure to let it dry completely before printing.
A clean print head is essential for crisp, clear images and a longer printer life (Zebra Technologies best practices). Many guides suggest cleaning it every time you change a ribbon or a roll of labels.
Test Prints Are Your Best Friend
We can’t stress this enough: always do a test print after changing any settings or when using a new type of label. It’s the easiest way to catch problems before you print hundreds of labels.
What should you include in your test print? Make sure it has:
- A small block of text.
- A barcode (if you use them).
- Any graphics or logos.
Then, hold it up to the light. Can you read everything easily? Does the barcode scan perfectly? Does it look sharp, or fuzzy? This simple step saves a lot of headaches and wasted labels down the line.
When to Seek Further Help
If you’ve tried adjusting darkness and speed, cleaned your print head, and recalibrated your printer, but still aren’t getting good results, it might be time to look at other factors. Perhaps the label material itself isn’t compatible with your printer, or there might be a hardware issue.
Don’t hesitate to check your printer’s user manual. It often has specific troubleshooting tips for your model. If you’re still stuck, reaching out to the printer manufacturer’s technical support is a great next step. They have the expertise to diagnose more complex problems.
“`Conclusion
You’ve now learned how to fine-tune your thermal printer for perfect prints! Remember, controlling print darkness and print speed is your most effective tool. Balancing these settings with your specific label type and ensuring your printer is calibrated will make all the difference. Don’t forget that regular print head cleaning is also key to longevity and quality. Start by making one small adjustment at a time and always, always perform a test print.
Your next step is to grab a sample label and follow the steps we outlined. You’ve got this! Dialing in these settings will save you frustration and wasted materials.
Frequently Asked Questions
What’s the difference between darkness and density on my thermal printer?
There’s generally no difference. “Darkness” and “Density” are just different terms used by manufacturers for the same setting. Both refer to how much heat your print head applies to the label, affecting how dark the printed mark is.
My thermal printer prints very faint labels. What should I do?
This is a common issue that usually means your darkness setting is too low. You need to increase the heat applied by the print head. Try increasing the darkness setting by one or two increments and perform a test print.
Can I print faster if I use a higher darkness setting?
While you might be tempted to increase both, it’s generally not recommended. Printing too fast with too much darkness can lead to smudged prints and excessive wear on your print head. It’s better to find a moderate speed and adjust darkness for clarity.
How often should I clean my thermal printer’s print head?
It’s best practice to clean your print head every time you change a roll of labels or a ribbon. Keeping it clean prevents debris from interfering with the heating elements, ensuring consistent print quality and extending the life of your printer.
My printer skips labels or prints them in the wrong spot. What’s wrong?
This usually indicates that your printer needs to be calibrated to your specific label size. Run the printer’s automatic calibration routine through its control panel or driver software. This helps the printer accurately detect where each label starts and ends.